
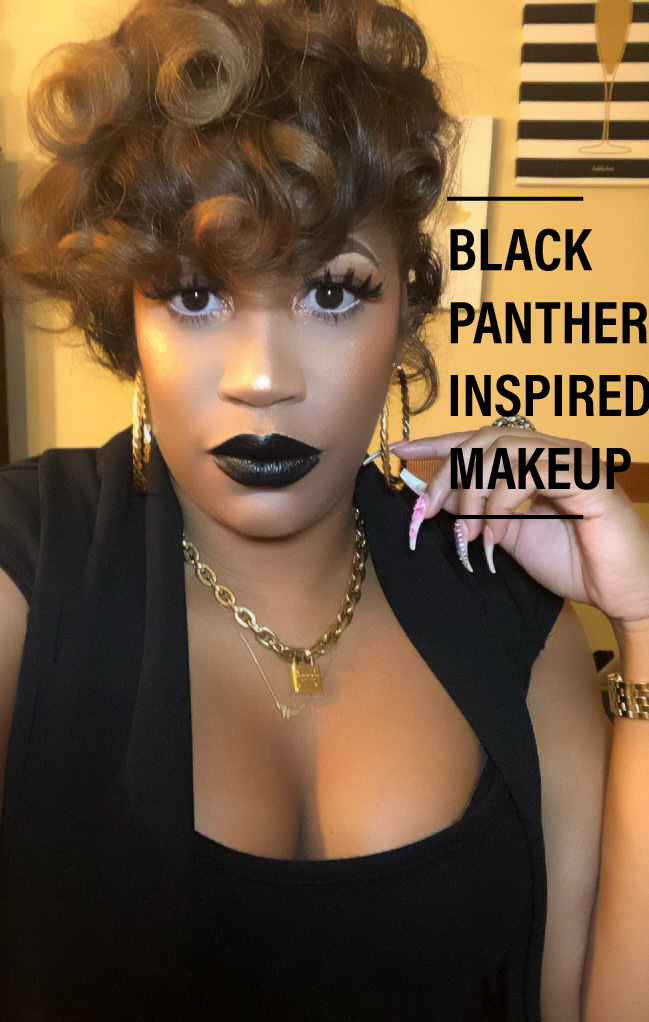
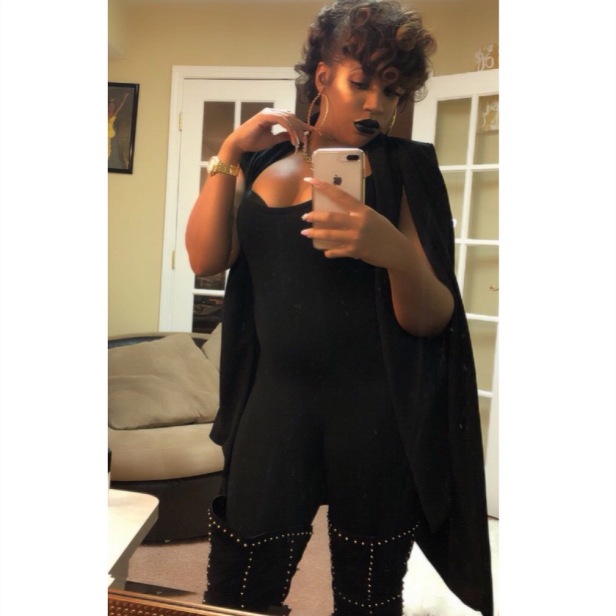
This past weekend was absolutely epic!! The overly anticipated movie “Black Panther” was released and it was record breaking! “Black Panther” made over $242 million during its debut weekend. Of course I had to be apart of the movement!!! I deliberated long and carefully all last week on what outfit I should wear but, more importantly how I should do my makeup. So, Friday I settled on double stacked lashes and black lipstick (my favorite lipstick color). As for my outfit I chose to wear a black cape accompanied with a one-piece jumpsuit and studded thigh-high stiletto boots. The movie theater I went to clearly wasn’t ready for me and all of my fabulousness! I was literally the only person dressed up for the occasion out of the hundreds of moviegoers that were there. Social media posts were full of people showcasing their best traditional African clothing. Others opted for an all black attire to represent the “Black Panther” theme like I chose to do. I had such an amazing time and it felt great to be apart of such a monumental moment.
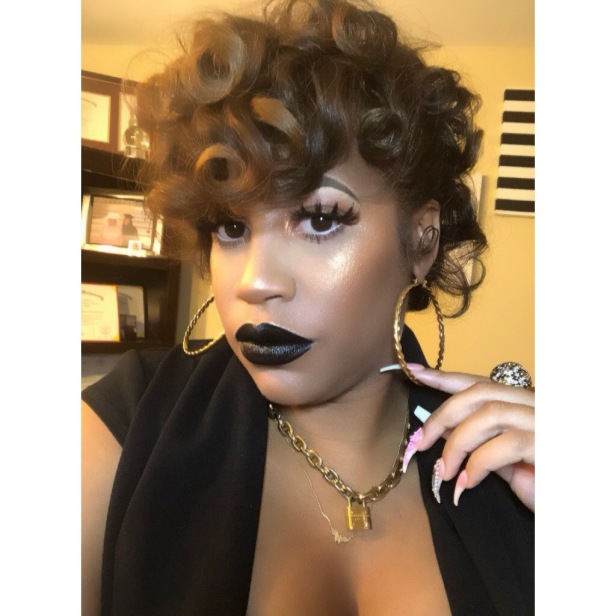
The makeup look I chose was natural glam amped up with heavy lashes and black lipstick. I believe any skin tone can rock black lipstick. In my opinion the key to wearing black lipstick is warming the skin up. I use more bronzer than I usually would when I wear black lipstick. I wear black lipstick just as much as I wear pink or any other color that is considered wearable. If you’ve been following my previous posts you will notice the makeup routine is the same as my Natural Glam with a twist of black. So let’s jump right into the glam!
STEP ONE
Start with a clean and moisturized face as usual. As you know by now I moisturize with MAC Strobe Cream ($33). I also buffed in a light layer of Nars multi-stick in South Beach ($39) which created a super dewy look. The goal is to shine bright like a diamond!
STEP TWO
I filled in my eyebrows with MAC Spiked brow pencil ($18). For a more defined appearance I cleaned up my brows with MAC Studio Finish Concealer ($21). I finished my brows off with a coat of clear brow gel from Anastasia Beverly Hills ($22). My brows do not budge at all with this brow gel.
STEP THREE
I used two layers of my favorite foundation, MAC Face and Body ($28). Face and Body is super dewy and radiant. I highlighted with MAC Prolongwear concealer ($23), which I set with Ben Nye banana powder ($8)
STEP FOUR
While baking the highlighted areas of my face, I set the non-highlighted areas of my face with MAC mineralize skin finish ($34). I warmed my face up with MAC Blunt Blush ($23). I dusted off the remaining banana powder and applied an obnoxious amount of Maybelline Master Chrome highlighter ($7.89) on the highest point of my cheeks. This highlighter is amazing! It gives you an unforgettable glow. Master Chrome definitely gives the high-end brands a run for their money. I used Becca Copper Skin Perfector (limited edition) as a blush. As you can see the reoccurring theme is GLOW.
STEP FIVE
Now it’s time for some fun!! I double stacked my favorite beauty supply store lashes, Gabriella ($1.99). I applied one coat of Too Faced Better than Sex mascara ($23) prior to applying my lashes. For an even more bright-eyed look I applied MAC eye kohl in fascinating (white, $17.50) to my waterline. I applied three coats of Better than Sex mascara to my bottom lashes.
STEP SIX
Showtime!!!! This look is all about the lips. I lined and filled my lips in with a black eyeliner pencil to act as a base for my lipstick. Then I applied my favorite black lipstick, MAC Hautecore. I bought this lipstick during Black Friday about four years ago. This lipstick was limited edition. It’s not a big deal if you don’t have black lipstick because you can completely fill your lips in with black lip liner or eyeliner and then apply a small amount of clear gloss.

Hot!!!
LikeLiked by 2 people
Thank You!!!
LikeLiked by 1 person
can you do a tut on how you get those gorg curls???
LikeLiked by 3 people
Awww babe thanks!!! I got you!
LikeLiked by 1 person
Chile lookin like a fly super hero!❤️ Pretty!
LikeLiked by 2 people
Thanks babe!!!
LikeLike
Tutorial PLEASE!!!
LikeLiked by 1 person
*taps mic* Firstly, Wakanda forever. Secondly, you are fine as all hell… we need you on video showing us how to snatch edges!!! Thirdly, I pretty much wore the same thing to the movie, lmao.
I love you in bold colored lipsticks! You wear every look SO well!
Dom
http://www.DivaNamedDom.com
LikeLiked by 1 person
Nice
LikeLiked by 1 person
Yes!! 👏🏽👏🏽👏🏽 I love the look!
LikeLiked by 1 person
Love this look! I hope you liked liked the movie, I loved it!
LikeLike